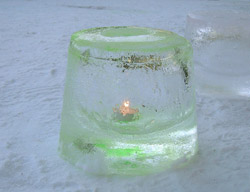
Ice Candles
 Small plastic tub or bucket (a summer beach pail is the ideal size).
Tin can or small plastic cup.
A few strategically placed ice candles can turn your backyard into a winter's evening wonderland. Ice candles are easy to make, and best of all, cost next to nothing.
The trick
The first step to create an ice candle is to make a mold. This is done by filling a bucket or pail with cold tap water and placing a tin can or cup in the center. Weigh it down with enough small rocks to almost, but not quite, sink it.
Place the bucket outside on the porch or in the freezer until the water is frozen solid. Carefully remove the block of ice from the pail or bucket (you might need to loosen the ice by running warm tap water over the bucket's surface for a few moments). Once the ice is free from the bucket, the next step is to remove the tin can or plastic cup from the center of the block. (If the can or cup seems locked in the ice you can fill it with warm water to make removal easier.)
Once the ice has been removed from the pail and the cup from the center of the block, you've got your basic ice candle. Just place a small candle at the bottom of the well where the cup used to be. Bingo! You've just made an ice candle!
Hints
To keep the can or cup from "drifting off center" you may want to anchor it in place by placing a stick across the top of the pail and taping the cup or can to the stick. An inverted sauce pan cover will also do the trick -- the knob at the top will prevent the cup or can from drifting too far from the center.
Rainbow ice candles
Essentially you follow the steps outlined above, except you will build your candle in stages. Fill your bucket with 1/2 inch cold tap water and let freeze. When your first layer has frozen solid, add another 1/2 inch of VERY COLD tap water and add several drops of food coloring. Freeze and repeat the process with a different food coloring for each layer. Don't forget to put a can or cup in the center to make space for your candle.